Manoid: Communication
2023-12-31Reports
Introduction
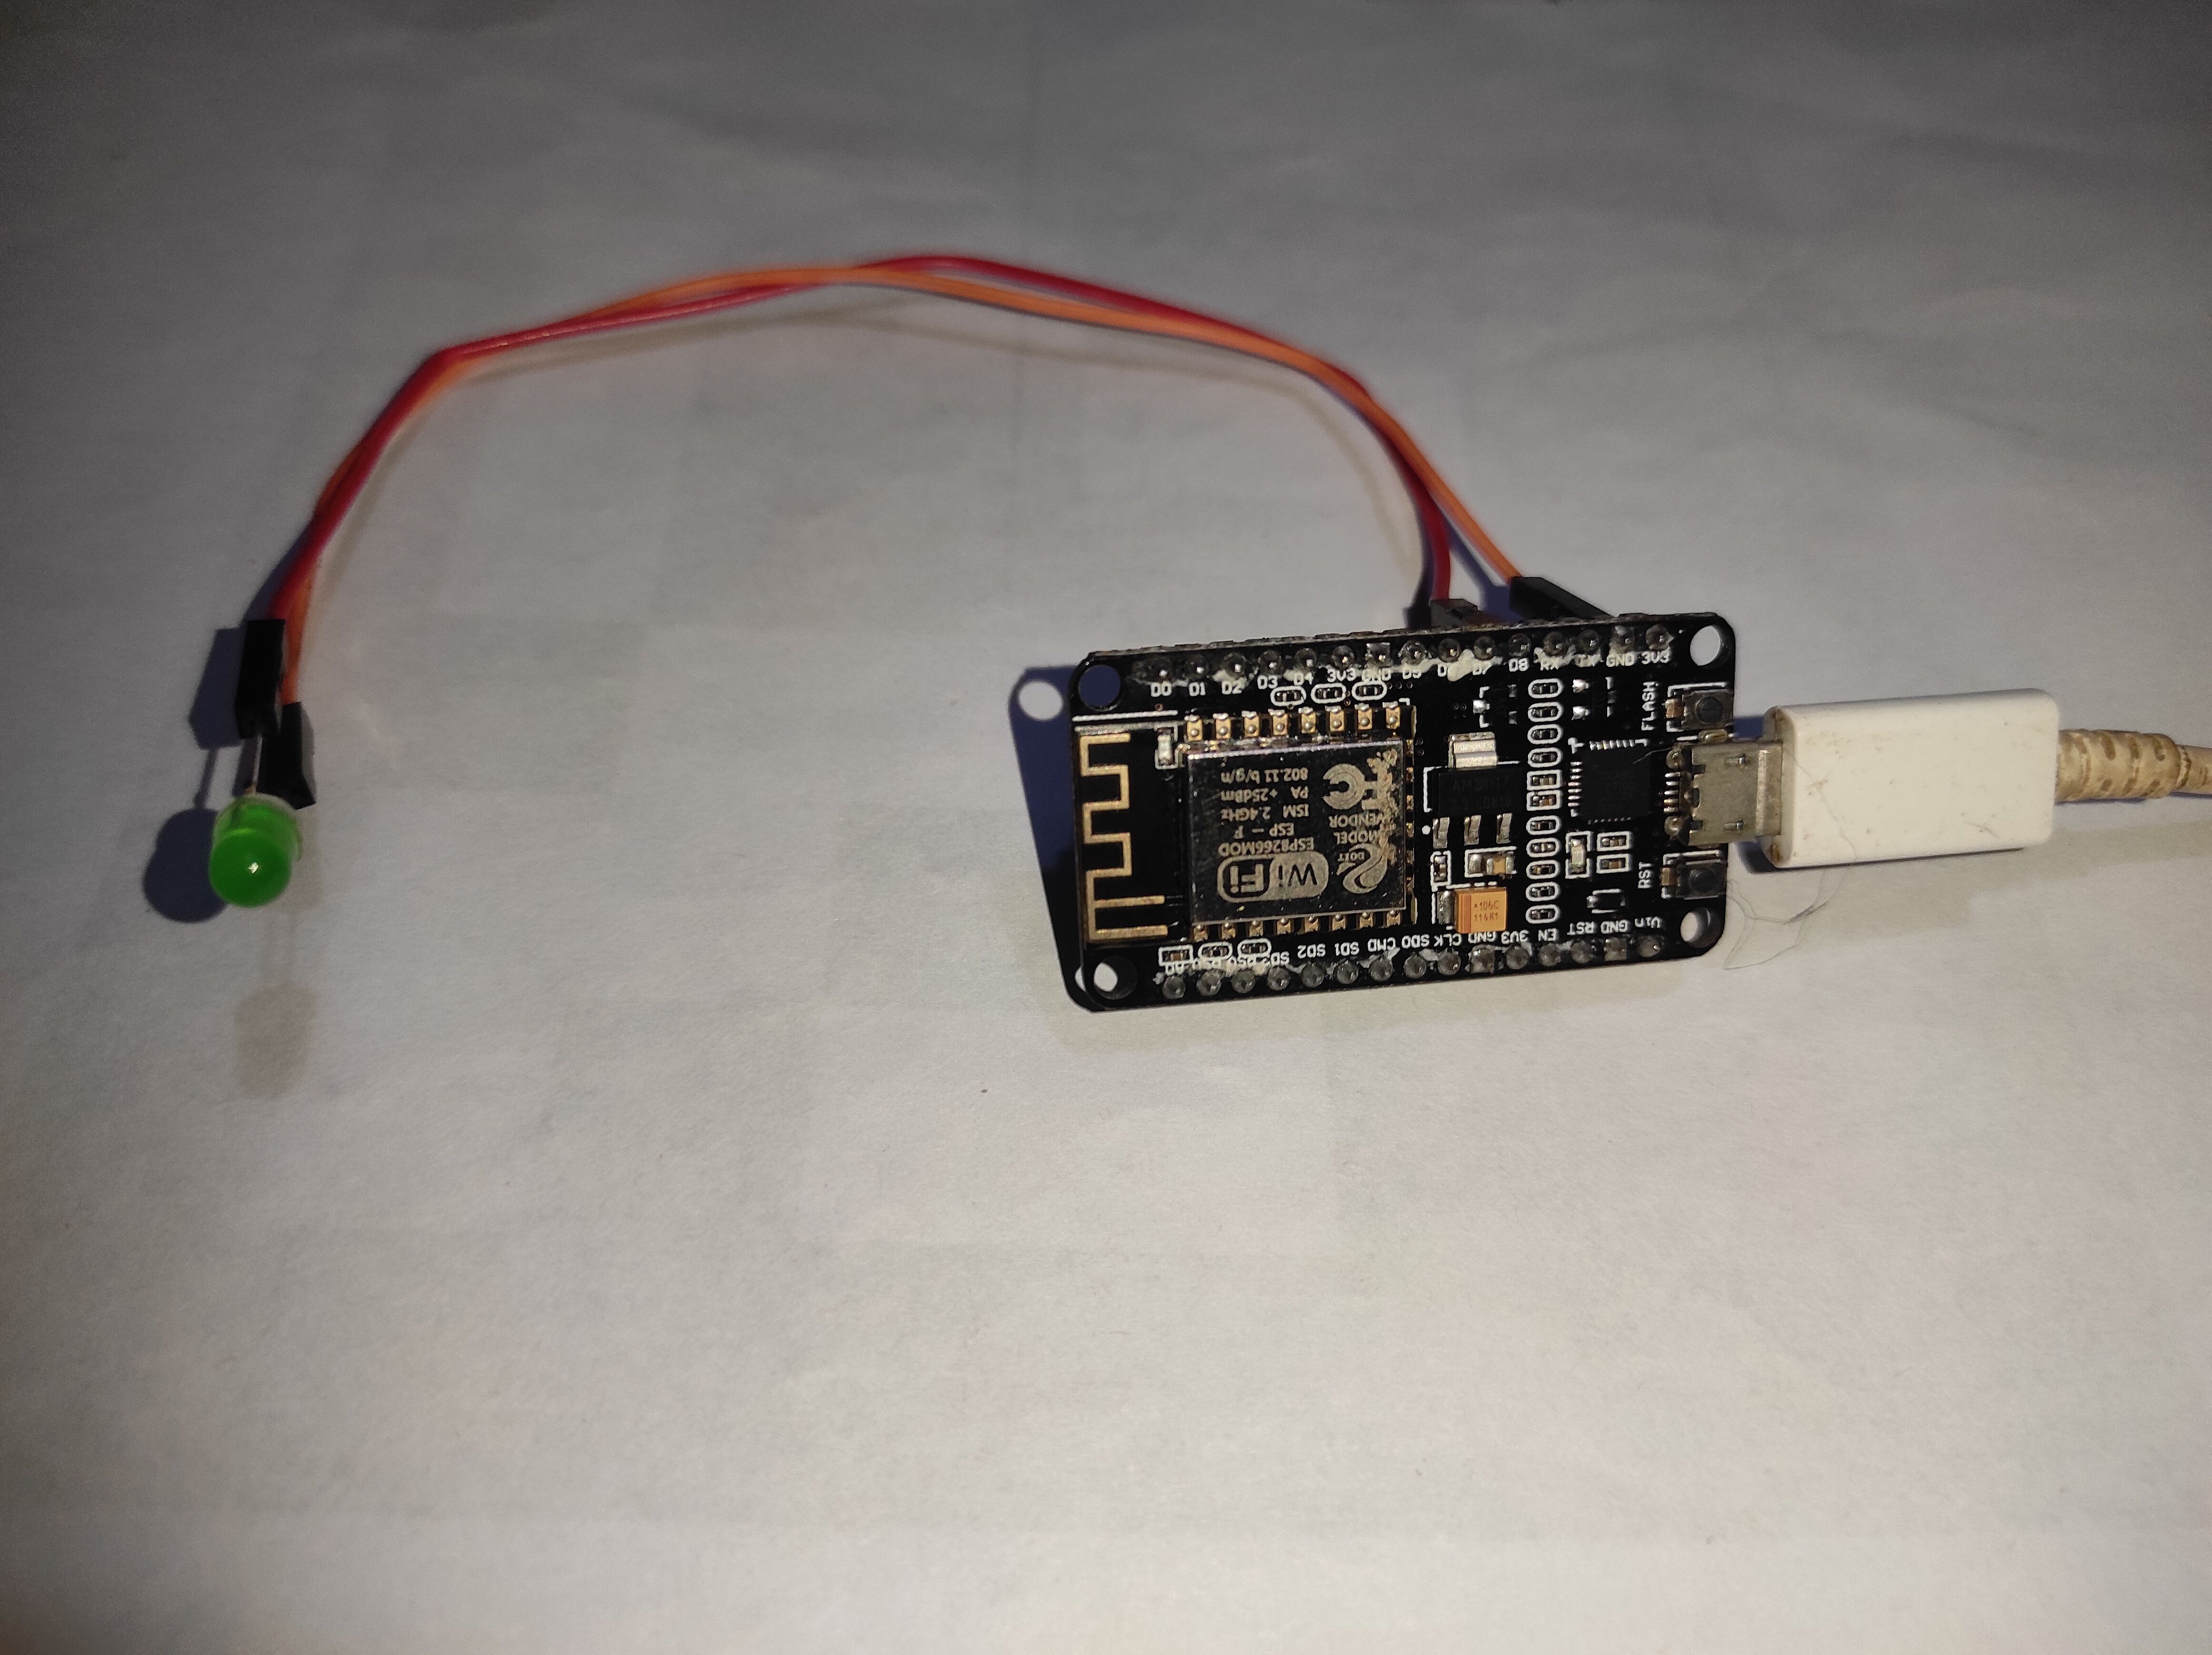
Building a clueless robot isn't an easy task and I am only in the beginning of it. This report will discuss on how to setup the microcontroller boards and how the communication will work for project manoid (A waste management robot). Also, the much difficult image processing and mapping is on the way, which I should be working on instead of writing this but I'll leave that for next year. Communication seems like a simple topic to work on for now.
Note : I wrote the code for the bot manoid in arduino's '.ino' instead of using micropython's '.py' but micropython can be used to do the same as well.
Requirements:
| Category | Component |
|---|---|
| Hardware | ESP8266 Microcontroller |
| Firmware | MicroPython (for receiving) |
| Software | Python (for publishing) |
| Software | esptool |
| Software | mosquitto (for serving) |
| Software | adafruit-ampy |
Basic Setup
Flashing Firmware
Micropython is an implementation of Python 3 that includes a small subset of the Python standard library and is optimised to run on microcontrollers and in constrained environments. The microcontroller I am using is the ESP8266 (NodeMCU). Flashing it with micropython was easy (for me), I've been flashing things since years. It goes like this:
- Install
esptooland erase flash your ESP8266 first.
You should first confirm that /dev/ttyUSB0 is your device which you want to flash
micropythonon.
esptool.py --port /dev/ttyUSB0 erase_flash
- Then flash the latest firmware of ESP8266.
esptool.py --port /dev/ttyUSB0 --baud 460800 write_flash --flash_size=detect 0 <path to the .bin file (firmware)>
The default flashing mode worked on my first ESP8266 but when I tried to flash it to another ESP8266 it flashes successfully but didn't let me access the repl. So, I had to set the flashing mode to dout.
esptool.py --port /dev/ttyUSB0 --baud 460800 write_flash --flash_size=detect --flash_mode dout 0 <path to the .bin file (firmware)>
- Check if everything is working by connecting to the
micropython repl. You can usescreenortmuxor your own solution to connect to therepl. Here is how you can use screen:
screen /dev/ttyUSB0 115200
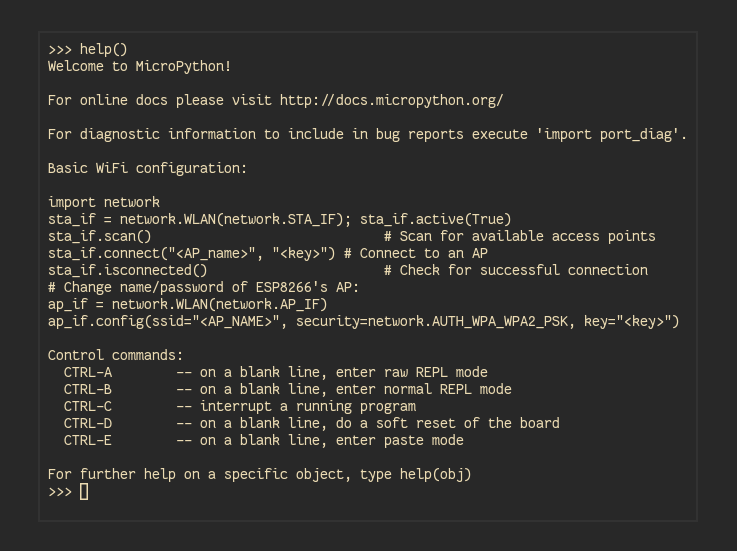
The above command gives you a blank screen, when you hit enter you'll get the prompt, type help and hit enter. This should show up:

MQTT
I am sure you played with the repl and now it's time to push some scripts to run in it. For now we will focus on using MQTT protocol to transfer data from one machine to another.
An overview of how MQTT works
- A MQTT client establishes a connection with the MQTT broker.
- Once connected, the client can either publish messages, subscribe to specific messages, or do both.
- When the MQTT broker receives a message, it forwards it to subscribers who are interested.
Here, server will be
mosquittorunning on the computer publisher will be thepython scripton the computer and subscriber will be theESP8266running micropython. [Message will be sent from python script through mosquitto server to ESP8266]
Mosquitto
To set the mosquitto server first we should allow port 1883 on your firewall. I am using a custom configuration file for now. So, make a file named mosquitto.conf and put the following lines to allow all connections:
    listener 1883
    allow_anonymous true
then run the server by the following command:
mosquitto -c ./mosquitto.conf
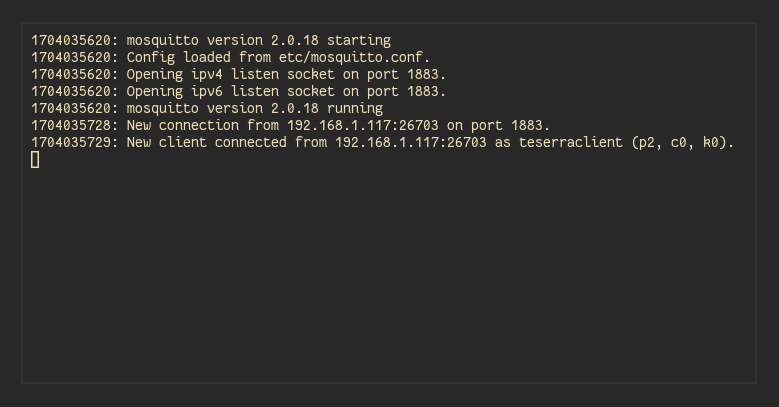
This is how it'll look when a client named tesseraclient connects to the server:

Pushing Scripts to the Microcontroller
There are two important files that MicroPython looks for in the root of its filesystem. These files contain MicroPython code that will be executed whenever the board is powered up or reset (i.e. it 'boots'). These files are:
boot.py
This file is run first on power up/reset and should contain low-level code that sets up the board to finish booting.
main.py
If this file exists it's run after boot.py and should contain any main script that you want to run when the board is powered up or reset.
To push the scripts I am using adafruit-ampy but the official way to push files is using their webrepl.
Using ampy you can push scripts with the following command:
ampy -p /dev/ttyUSB0 put <filename.py>
Programming
Publisher
Firstly a python script on the computer to send messages, it sends on and off in the interval of 500ms with topic led to the mosquitto server:
    import time
    import paho.mqtt.client as mqtt
    BROKER_ADDRESS: 000.000.00.00 # IP address of the device running the mosquitto server


    def on_connect(client, userdata, flags, rc):
        if rc == 0:
            print("Connected to broker")
        else:
            print("Connection failed with code", rc)


    def on_disconnect(client, userdata, rc):
        print("Disconnected from broker")


    def establish_connection():
        client_id = "tesserver"
        client = mqtt.Client(client_id=client_id)

        client.on_connect = on_connect
        client.on_disconnect = on_disconnect

        client.connect(BROKER_ADDRESS, 1883, 60)

        return client

    led_topic = "led"
    client = establish_connection()

    client.publish(led_topic, "off")
    time.sleep(500)
    client.publish(led_topic, "off")
    time.sleep(500)
Subscriber
boot.py
This will start when I plug the esp to the power supply. No need to connect via webrepl and start manually. Generally it's not recommended to touch the boot.py file. main.py should be used instead but this is I who programming the microcontroller so boot.py it is.
    import esp
    import os, machine
    import gc
    import webrepl

    webrepl.start()
    gc.collect()

    import network
    import time
    import machine

    # Wi-Fi configuration
    ssid =  abcdef #WIFI_SSID
    password = 12345678 #WIFI_PASSWORD


    # Function to connect to Wi-Fi
    def connect_wifi():
        wlan = network.WLAN(network.STA_IF)
        wlan.active(True)

        if not wlan.isconnected():
            print("Connecting to WiFi...")
            wlan.connect(ssid, password)
            # wlan.connect(ssid)

            while not wlan.isconnected():
                time.sleep(1)

        print("Connected to WiFi")


    # Connect to Wi-Fi
    connect_wifi()

    # Check if Wi-Fi connection is successful before executing mqtt.py
    if network.WLAN(network.STA_IF).isconnected():
        # Execute mqtt.py
        try:
            import mqtt  # Replace 'mqtt' with the actual name of your Python script
        except Exception as e:
            print("Error executing mqtt.py:", e)
mqtt.py
Upon connecting to the WIFI successfully the above script will import this file and things magically happen.
    import machine
    from umqtt.simple import MQTTClient
    import time
    from secrets import BROKER_ADDRESS

    # MQTT configuration
    client_id = "teserraclient"
    broker_address = 000.000.00.00 # IP address of the device running the mosquitto server
    led_topic = b"led"

    # LED Pin
    led_pin = machine.Pin(15, machine.Pin.OUT)


    def connect_mqtt():
        c = MQTTClient(client_id, broker_address)
        c.set_callback(callback)

        while True:
            try:
                c.connect(clean_session=False)
                print("Connected to MQTT broker.")
                c.subscribe(led_topic)
                return c
            except OSError as e:
                print(f"Connection error: {e}")
                print("Retrying in 5 seconds...")
                time.sleep(5)


    def callback(topic, msg):
        print(f"Received message on topic {topic.decode('utf-8')}: {msg.decode('utf-8')}")

        if topic == led_topic:
            if msg == b"on":
                print("Turning on the LED")
                led_pin.on()
            elif msg == b"off":
                print("Turning off the LED")
                led_pin.off()


    mqtt_client = connect_mqtt()

    if mqtt_client:
        print("Waiting for messages...")
        while True:
            try:
                mqtt_client.wait_msg()
            except OSError as e:
                print(f"Error: {e}")
                print("Reconnecting...")
                mqtt_client = connect_mqtt()
                if not mqtt_client:
                    break
Finally
If everything works after installing all the python dependencies you will see this if you are supplying power to your microcontroller using a computer that can accept serial in upon doing a soft reboot and running your python (publisher) script from your computer.

This indicates that the publisher i.e. python script has connected to the server i.e. mosquitto and is now sending on and off messages to the server with topic led which then is sent to the subscriber i.e. ESP8266 which is interpreted by the microcontroller as a command to enable and disable the set GPIO pin i.e. pin 15 if you look closely at the code.
